Still looking for a truck. Been to see a Toyota Dyna that would have done, nice big deck (the deck is going to stay and a 4 meter one will leave me room for my cunning plan...) but had too much floor pan rust the owner 'didn't know about'. Pity. It ran and drove nicely. The search continues. There are some good'uns about but none in my general location. Just have to stay on the case.
Now the rant.
New Zealand has had a horror week for cyclists getting squashed by car, and in one case, truck, drivers. 5 Since last saturday. Ok, maybe for China or something this would be unfortunate but statistically ordinary, but here, not so much. Let me be clear, I have no particular axe to grind for or against cyclists on public road, I've been a daily peddle hound myself at several points in my life. Good exercise, cheap transport (if you don't mind riding a budget cycle) and yes, that wonderful catch cry Good For The Environment. Seems to me tho, that all of that is wasted by just one solid stay in hospital as the result of a bike crash.
The general hue and cry seems to revolve about road users (vehicle's other than cyclists, that) should be constantly aware of cyclists, pass them with a minimum of 1.5 meters clearance, look around more at intersections etc etc. All sound and sensible advice, I'm not arguing with any of it. After all, they have a just as much right to the road as anybody, huh?
No.
They are the only regular road users who don't pay to use the roads. Trucks pay, quite a lot. Ordinary cars pay. Motorcyclists get royally reamed. Anyone who uses diesel has to pay road tax by the kilometer.
This is the part where the arguments of 'cycles don't pollute and use road space much more efficiently.' get trotted out. Yes and yes, not arguing them either...well not exactly.
In order to pass a cycle on a standard road with 1.5 meter clearance and not cross the center line, the cyclist needs to be on the extreme left hand edge of the tar seal, something which some, but by no means all, do. More likely the only way to pass cleanly is with your wheels on the center line. Ok just as long as there is no one coming the other way. Like a string of traffic, for instance. Then you get to choose between missing the oncoming traffic by passing nice and close to the cyclist, or missing the oncoming traffic by less then might be good practice. But that's ok, these things happen.
All this is assuming that there is only one cyclist, or several that are in single file. Trouble is, the inconsiderate dicks will not uncommonly insist on riding two and, occasionally if you are lucky, three abreast. I've seen it. Then what? Miss both the on-coming traffic AND the cyclists by a coat of paint? I'm staggered there hasn't been a massive pile-up caused by just this situation. Single file at all times should be the enforced rule.
The lack of consideration continues. Here is an individual exercise for you, dear reader. Find a comfortable cafe in the mid-city some place, pick a window seat and for the next fifteen or twenty minutes count the cyclists flouting road rules in a manner that would get any car driver locked up in prison.
Jumping red lights, diving through gaps in the traffic, one way streets in any direction, you name it. Don't even get me started on cycle couriers. Then when they get knocked off they piss and moan about how dangerous cars are.
At best they are non-paying guests on the public roads the rest of us have to pay to use, and like all good guests they should remember their manners.
It would be easy to think at this point that I want to see push bikes banned from our roads. Not so. They serve a useful function and I'm all in favor of cycle lanes, by-ways around narrow bridges and tunnels etc. Lower the speed limit on some inner city roads to make then safer for everybody, I never did like the 'one size fits all' New Zealand approach to speed limits, the standard 50kph is far too fast on many inner city and not a few suburban roads just as 100kph is too slow on some highways.
So I think it comes down to this. Road users generally should be aware of the fragility and frequent unpredictability of cyclists who in turn need to understand that they are also bound to and by the rules of the road the rest of us have to abide by. I'm all in favor of care and courtesy, but, if you will forgive the pun, it has to be a two way street..
Here endeth the rant.
Thursday, November 18, 2010
Monday, November 8, 2010
Step eight. Rust never sleeps.
It's been an interesting day. Found a local engineering firm who does the major steel work for a paint and panel business who specialize in restoring old cars. Perfect. Well, kind of. The feller got underneath, prodded and poked, mumbled a bit then said yeah, he could fix the chassis rails for about $600 but the cab was full of rot that, pending a full strip and restore, would always be a problem. Reluctantly I have to concur. Here's the problem. Spend $$$ now getting to warrant-able standard, then spend the rest of the time I own it chasing the rust in the cab. No.
Some research on TradeMe turned up a good number of likely light trucks in the NZ$2500-5000 range, cheaper if I settled for a petrol powered item. If I'm going to go the the trouble of re-trucking it, I might as well get one I want as opposed the cheapest one that would do at a pinch.
I had a good hard look underneath at just how the camper was fixed to the chassis, 4 large bolts and 2 stirrup straps by my counting. After that it slides off. That doesn't sound like many fixings but the camper probably only weighs half a ton or so. Taking it off will look impressive, but really no harder than removing a flat deck. Well do-able.
It's going to be an interesting time, folks, but luckily there is no need to go rushing about the place.
Sunday, November 7, 2010
Step seven. Martin-Baker rusting....
'No reason not to get a Warrant of Fitness and start driving.' The Gods of the Road put their heads together and had a snigger then plotted against such hubris.
Drove M-B to the garage for a warrant check, went back to pick it up expecting to have to sort some niggling lil details such as the missing bolt from under the front passenger seat I didn't know about.
What I WASN'T expecting was to be told the sub-chassis and front spring mounts were full of rust and needed sorting before any hope of a WoF. There is also a starting amount of rot in the front guards I knew about but wasn't worried about, figuring to have that cut out and covered later.
This is a biggie, people. My options are 1: Sell it now and recoup what I have a spent plus a few bucks. After all the work I've put into it? Not if I can help it! 2: Re-truck it, ie remove the Transit from underneath and put something else in it's place. The expensive option but would end up with something much more modern and diesel. 3: The one I'll probably take. Take it to an honest panel beater (oxymoron?) drop my pants, bend over and invite him to climb aboard. This will most likely be the 'cheapest' option and, if nothing else, I'll end up with a rust free and ship-shape vehicle.
I'm consoling myself with the fact that at least I'm doing this now while I have the time, resources and, to a certain extent, the filthy lucre to make this last happen. To have to go through this while I was on the road and tripping from short time money maker to short time money maker would have been a dream killer.

I'm going to have to take a few days do some research on this one. I'll keep you posted.
Step six. Keeping my cool.
Son of a *&%#@! Parking M-B back in the garage I noticed a pool of steaming water under the front end... ok, no panic, could be a few different things, just take a look.
Ah. Broken hose clip allowing the return hose to get loose. Bound to have another clip here some place. Huh. That's interesting (disturbing), the radiator is being held in by 3 bolts instead of 4, the bracket for the 4th has rusted clean away. It's official, radiator comes out. A spanner and a screwdriver later and it's on the ground. As much as I curse this thing some days, no one can accuse it of being hard to work on.
OK. The front of the radiator is all munted, whole sections of fins missing. Nothing for it now, needs professional help. Looking at the fan, I noticed it had 4 blades instead of 6, 2 (opposing) blades having been snapped off. Icky! That'll need replacing too, but that will be easy.
A trip in to Levin to the only radiator fixer in town and the good news just keeps on coming. The guy behind the counter took one look at it and said 'It's leaking there (point with ballpoint pen) too.' Yup, sure is, even I could see that.
Overheating is a total drag, so I just nodded when he said it would need a complete re-core and recondition. NZ$368. Ouch. No point wailing about, has to be done.
6 Days later, go and collect, pay the nice man (fair's fair, it looked like new, bracket neatly fixed and the whole thing repainted, even threw in a new pressure cap) and go to leave. Oh yeah, might as well have new hoses while I'm at it. It was at this point old demons came back to haunt.

Remember the engine had been replaced? The radiator hadn't and standard hoses didn't even come close to fitting. Compared the old hoses to what he had on hand and nothing matched. Still, directly across the road was a Repco outlet, surely they would have something to suit. Trot over, collar one of the counter jumpers and hand over the old top hose (turned out the bottom hose was ok, that goes back in), the guy tapped on his pc a bit, looked thoughtful and wandered off out the back. 5 Minutes later he's back with what looks like a brand new hose, you beaut!
Back home. In one of those moments when karma flicks you one, hanging up in the garage and left over from the property's previous petrol head owners is a brand new generic cooling fan. Once I reamed out the pilot holes it was a dead fit if about 20mm thicker than the old one. No sweat, the fan bolts had thick spacers on them anyway, just ditch them in favor of a regular washer each and all went together easily. Drop in the new radiator, the extra fan width proving no problem, reinstall the 3 bolts left over and find a forth from the bolt box and all looks impressive. Bottom hose with new clips on and tightened, top hose.......is about 70mm too short! Rude words. More rude words. Swear as I might, there was no way the new hose was going to work. Contemplate putting the old hose back on and hope the split I noticed starting doesn't blow through at an awkward moment. No, wont do, has to be a new one. Hmm.
The obvious solution here is to cut the hose in half and put in a metal tube spacer. Not what I hoped for but not the end of the world either. Just need to find a piece of pipe. Hunt high and low in the workshop. Nope. A piece of exhaust tail pipe from M-B would fit (store that lil snippet away for later, you never know.) but I don't want a steel spacer, has to be stainless steel or copper.
Next trip to Levin for groceries and I also cruise the main drag for a plumbing shop. There's one! Plumbing World, sounds perfect. A quick peruse of the pipe rack, and there in the odds and ends collection is a meter length of thick wall brass (!) pipe exactly the right diameter! Sure, the counter guy said, there's a hack saw, cut off what you need. Cut 6 inches off the end and guy tells me not to bother paying him, he can't be bothered working out what it would cost. Thanks, good karma to you!
Back home, spacer in with 2 new stainless clips, fill the radiator with anti-freeze and water and start up. As usual the last air bubble didn't want to come out, but some hose squeezing and engine idling later it burped a couple of times and all was well. A trip around the block showed the needle hold nicely just under halfway and I'm feeling better.
No reason not to get a Warrant of Fitness and start driving!
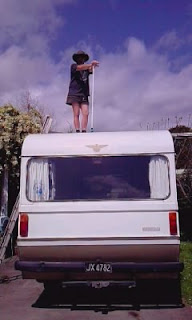
Step five. Up on the roof.
Enough fun and frivolity, it's time to assault the job I've been putting off. The (quite leaky) roof.
Inside there is evidence of several historical leaks, the ceiling lining is stained and cracked in a few different places with little sign of any attempt to fix. The outside top of the back window is under about a centimeter of layers of goop where it has obviously been leaking but as fixes go that's about it. The window seal I'll have professionally fixed sometime soon, but not now.
Step one, let's get up on the roof and look it over. It was encrusted with years of dirt, dried mud etc so a stiff broom was called upon to do it's thing. Once that was done it didn't look to bad, but then it only takes a tiny crack to stuff the whole arrangement so I wasn't fooled. What was obvious was that at several points in it's life the poor thing had been driven into, and in one case under, things it's shouldn't have.
On the roof over the side door were a set of dents evenly spaced and running most of the length as if someone had tried to park under a just too low garage or carport and missed by an inch. The front right had corner damage at bed height (remember I said there had been a leak in the bunk?) a good biff that had sprung the sealing strip and embedded bits of bark and wood between it and aluminium sheeting. Solid suspect! Ditto the right hand back corner except that one looked more like something rather more solid. Poor thing!
I also strongly suspect it's been tail ended traffic style at some stage, when I was fixing the back wall inside there was quite a lot of what looked a lot like stove damage, like as if it had had a good whack at tail light level. Poor thing!
Sweeping and initial survey done, it all looks fixable.
Set to work with a wire brush and a screw driver carefully prying the edging strip out a few millimeters and scrubbing out the accumulated dirt and paint flakes from behind. I'll just do the roof for now, the sides are easily reached to be done later. to make my life just a little easier, the edging strip was aluminium and nailed through to the wooden frame underneath.
Worked my way right around the edge of the roof, prying and wire brushing as I went, it didn't seem too bad, or at least not the horror show it could have been and I was (dreading) half expecting. Only took a couple of hours. Found a couple more places where it had backed into stuff or tried to be driven under tree branches etc. Poor thing. Mental note to self: Be paranoid about roof and corner clearance! Took the opportunity to measure the total height including roof ventilator (another leak source...) for later reference, 2.8 meters would clear with nothing to spare.
Set to work with a big tube of industrial silicone sealer, a small piece of stiff wire and a hammer. Squirt in the silicone, use the wire to make sure it was right in behind the sealing strip then hammer flat with...well...the hammer. It was somewhat of the pleasure to watch the silicone vanish behind the strip, then some (but not all) of it reappear as I hammered the strip flat again. Take that, damned leaks!
Go right around the outside edge twice, just to make sure, then the 3 joins across the roof where the aluminium sheets came together. These didn't *seem* to be a leak problem, but the sealer gun and I here, so why the hell not. Used up a full tube of silicone and started on a second. If I didn't know better I would swear it was soaking the stuff up. As I was working my way around the edges it was apparent the sides were going to need attention, too, sprung rivets and the like. That's ok, get to them later.
Had a good hard look at the roof ventilator for possible leaks, it was easy to see someone had replaced the whole thing at some stage (well it is 30 years old) and then epoxied the bolt heads at some point after. Suspicious. Didn't silicone it, I have other plans for that.

This all took a couple of days in easy stages, the smell of drying silicone sealant was fairly potent at night but I told myself that was the smell of dying leaks. Probably about a spoonful was actually killing of the old leaks the rest being decoration. Ah yes! you say, but which spoonful? Whatever, it's all done now, which means I can.....
Paint.
Hmm, paint. Which one? Visited a couple of camper dealers for ideas and came away short on useful info but with several offers of 'Sure, we can do that for you.' Not bloody likely! Not on my budget, anyhow. My first thought was a good quality latex roof paint, thick and flexible as well as easy to put on and clean up. Campers by their very nature shake and rattle in Transit (badaboom!), it seems logical that a paint that could flex a bit without cracking would be a good thing. A couple of nights cruising the internet for classic camper and caravan restoration sites increasingly showed this to be a solid option. Easily do-able and simple to maintain. A plastic screw top jar of pint and a brush stowed on board and you're laughing.
Granted, a professional 2 pot automotive paint job would look great but not on my budget and I have real doubts about it's flexibility anyhow. Roof paint it is then. While out shopping for fabric in Palmerston North I noticed a huge paint shop (Resene's) with a small shop attached to one side marked Resene Automotive....oh yes!
Stopped in, had a deeply useful chat with one of the sales guys about what I was doing and how best to go about it, preparation of aluminium for painting etc and came away with a 4 liter tin of best quality white plastic roof paint that would comfortably stick to both aluminium and silicon sealer. NZ$96.
Turned out preparation of the surface was wire brush away dirt and loose paint flakes, sponge clean, allow to dry then paint. I can do that! Last thing to do was to take a hot air gun to the 'Goldies' sticker on the front then wipe with meths and a rag to remove the last traces of glue. Sailors would have you believe it's bad luck to change the name of a ship, but A: it's not a ship, at least in the strictest sense of the word tho the similarities are not to be denied, B: Goldies referred to the then owner, not the camper as an entity and C: I'm not that superstitious anyhow. I like black cats, 13 is just a number and walking under ladders just means looking up to see if there is anything up there to fall on you. Granted, some superstitions have basis in fact, like being bad luck to light more than 1 (or is it 2?) cigarettes with the same match. This came about from WW1 when snipers would watch at night for the sudden glow of a match, take aim and...well you get the idea. Bad luck indeed. I don't smoke.
By this stage the silicone was good and hard, so it was pour some paint into a small jar and up the ladder with an inch brush to paint over the sealing strip and a couple of inches down the sides.
Nice paint! Not quite as thick as yogurt and amazingly sticky to boot. Slather it all over the places I resealed. Give it an hour to harden then do it all again. And again. Good stuff! Leave to go off properly over night.
Next day, back on the roof to do the roof joints and ventilator. Remove ventilator lid to expose the combing. Assault with small brush and lots of paint. 5 Coats. All over the place, right up to the soft seal, making sure to swamp all seams, joins and bolt heads. In between coats I ran a couple of coats over the roof seams as well. Up till now I had been clambering back and forth across the roof on a ladder laid from side to side to give good access to the ventilator and cross seams, the ladder was taken down and a 5 inch brush was firmly fixed to a broom stick long enough to reach the middle from a ladder leaned against the side. Paintpaintpaint. 3 coats in 2 hours with a liberal dividend for the edges I painted yesterday. As a rule I don't like painting but this was fast and easy, 2 of my favorite things.

Byebye Goldie! The front panel got 5 coats. Seems only right, that's the bit that will get pounded the most.
I wont know until the 1st decent wetting, but I strongly suspect I've killed off most of the leaks. Hope so......water is insidious stuff, the least gap and in it comes. M-B has been under cover for nearly a year now, it's as dry inside as it will ever be and I want to keep it that way. Generally the first indication you have of a leak is the stuff actually oozing/dripping inside, by that stage the insulation in the walls/roof has soaked up as much as it's going to already and fixing the leak is retroactive at best. Better, I think, to go to some pains now and hopefully not have to fix a leak at all. A camper that won't shrug off a dousing is called a sieve.
All in all I'm feeling a bit pleased with myself.
Inside there is evidence of several historical leaks, the ceiling lining is stained and cracked in a few different places with little sign of any attempt to fix. The outside top of the back window is under about a centimeter of layers of goop where it has obviously been leaking but as fixes go that's about it. The window seal I'll have professionally fixed sometime soon, but not now.
Step one, let's get up on the roof and look it over. It was encrusted with years of dirt, dried mud etc so a stiff broom was called upon to do it's thing. Once that was done it didn't look to bad, but then it only takes a tiny crack to stuff the whole arrangement so I wasn't fooled. What was obvious was that at several points in it's life the poor thing had been driven into, and in one case under, things it's shouldn't have.
On the roof over the side door were a set of dents evenly spaced and running most of the length as if someone had tried to park under a just too low garage or carport and missed by an inch. The front right had corner damage at bed height (remember I said there had been a leak in the bunk?) a good biff that had sprung the sealing strip and embedded bits of bark and wood between it and aluminium sheeting. Solid suspect! Ditto the right hand back corner except that one looked more like something rather more solid. Poor thing!
I also strongly suspect it's been tail ended traffic style at some stage, when I was fixing the back wall inside there was quite a lot of what looked a lot like stove damage, like as if it had had a good whack at tail light level. Poor thing!

Sweeping and initial survey done, it all looks fixable.
Set to work with a wire brush and a screw driver carefully prying the edging strip out a few millimeters and scrubbing out the accumulated dirt and paint flakes from behind. I'll just do the roof for now, the sides are easily reached to be done later. to make my life just a little easier, the edging strip was aluminium and nailed through to the wooden frame underneath.
Worked my way right around the edge of the roof, prying and wire brushing as I went, it didn't seem too bad, or at least not the horror show it could have been and I was (dreading) half expecting. Only took a couple of hours. Found a couple more places where it had backed into stuff or tried to be driven under tree branches etc. Poor thing. Mental note to self: Be paranoid about roof and corner clearance! Took the opportunity to measure the total height including roof ventilator (another leak source...) for later reference, 2.8 meters would clear with nothing to spare.
Set to work with a big tube of industrial silicone sealer, a small piece of stiff wire and a hammer. Squirt in the silicone, use the wire to make sure it was right in behind the sealing strip then hammer flat with...well...the hammer. It was somewhat of the pleasure to watch the silicone vanish behind the strip, then some (but not all) of it reappear as I hammered the strip flat again. Take that, damned leaks!
Go right around the outside edge twice, just to make sure, then the 3 joins across the roof where the aluminium sheets came together. These didn't *seem* to be a leak problem, but the sealer gun and I here, so why the hell not. Used up a full tube of silicone and started on a second. If I didn't know better I would swear it was soaking the stuff up. As I was working my way around the edges it was apparent the sides were going to need attention, too, sprung rivets and the like. That's ok, get to them later.
Had a good hard look at the roof ventilator for possible leaks, it was easy to see someone had replaced the whole thing at some stage (well it is 30 years old) and then epoxied the bolt heads at some point after. Suspicious. Didn't silicone it, I have other plans for that.

This all took a couple of days in easy stages, the smell of drying silicone sealant was fairly potent at night but I told myself that was the smell of dying leaks. Probably about a spoonful was actually killing of the old leaks the rest being decoration. Ah yes! you say, but which spoonful? Whatever, it's all done now, which means I can.....
Paint.
Hmm, paint. Which one? Visited a couple of camper dealers for ideas and came away short on useful info but with several offers of 'Sure, we can do that for you.' Not bloody likely! Not on my budget, anyhow. My first thought was a good quality latex roof paint, thick and flexible as well as easy to put on and clean up. Campers by their very nature shake and rattle in Transit (badaboom!), it seems logical that a paint that could flex a bit without cracking would be a good thing. A couple of nights cruising the internet for classic camper and caravan restoration sites increasingly showed this to be a solid option. Easily do-able and simple to maintain. A plastic screw top jar of pint and a brush stowed on board and you're laughing.
Granted, a professional 2 pot automotive paint job would look great but not on my budget and I have real doubts about it's flexibility anyhow. Roof paint it is then. While out shopping for fabric in Palmerston North I noticed a huge paint shop (Resene's) with a small shop attached to one side marked Resene Automotive....oh yes!
Stopped in, had a deeply useful chat with one of the sales guys about what I was doing and how best to go about it, preparation of aluminium for painting etc and came away with a 4 liter tin of best quality white plastic roof paint that would comfortably stick to both aluminium and silicon sealer. NZ$96.
Turned out preparation of the surface was wire brush away dirt and loose paint flakes, sponge clean, allow to dry then paint. I can do that! Last thing to do was to take a hot air gun to the 'Goldies' sticker on the front then wipe with meths and a rag to remove the last traces of glue. Sailors would have you believe it's bad luck to change the name of a ship, but A: it's not a ship, at least in the strictest sense of the word tho the similarities are not to be denied, B: Goldies referred to the then owner, not the camper as an entity and C: I'm not that superstitious anyhow. I like black cats, 13 is just a number and walking under ladders just means looking up to see if there is anything up there to fall on you. Granted, some superstitions have basis in fact, like being bad luck to light more than 1 (or is it 2?) cigarettes with the same match. This came about from WW1 when snipers would watch at night for the sudden glow of a match, take aim and...well you get the idea. Bad luck indeed. I don't smoke.
By this stage the silicone was good and hard, so it was pour some paint into a small jar and up the ladder with an inch brush to paint over the sealing strip and a couple of inches down the sides.
Nice paint! Not quite as thick as yogurt and amazingly sticky to boot. Slather it all over the places I resealed. Give it an hour to harden then do it all again. And again. Good stuff! Leave to go off properly over night.
Next day, back on the roof to do the roof joints and ventilator. Remove ventilator lid to expose the combing. Assault with small brush and lots of paint. 5 Coats. All over the place, right up to the soft seal, making sure to swamp all seams, joins and bolt heads. In between coats I ran a couple of coats over the roof seams as well. Up till now I had been clambering back and forth across the roof on a ladder laid from side to side to give good access to the ventilator and cross seams, the ladder was taken down and a 5 inch brush was firmly fixed to a broom stick long enough to reach the middle from a ladder leaned against the side. Paintpaintpaint. 3 coats in 2 hours with a liberal dividend for the edges I painted yesterday. As a rule I don't like painting but this was fast and easy, 2 of my favorite things.

Byebye Goldie! The front panel got 5 coats. Seems only right, that's the bit that will get pounded the most.
I wont know until the 1st decent wetting, but I strongly suspect I've killed off most of the leaks. Hope so......water is insidious stuff, the least gap and in it comes. M-B has been under cover for nearly a year now, it's as dry inside as it will ever be and I want to keep it that way. Generally the first indication you have of a leak is the stuff actually oozing/dripping inside, by that stage the insulation in the walls/roof has soaked up as much as it's going to already and fixing the leak is retroactive at best. Better, I think, to go to some pains now and hopefully not have to fix a leak at all. A camper that won't shrug off a dousing is called a sieve.
All in all I'm feeling a bit pleased with myself.
Friday, November 5, 2010
Step four. Pump up the volume.
All the time I've been messing about in the back of M-B I've been listening to my cd-radio-alarm clock. A dinky lil thing, just right if you want to be woken up with a pre-chosen cd of a morning. I HATE those electronic beepy bipbipbip...bipbipbip...bipbipbip type alarms, that is no way to be yanked out of sleep. Radio is better tho choice of station is critical. Those brashly loud morning disk jockeys are nearly as bad, and some of the 'funny' morning crews remind me why I'm pro-abortion.
Up front in the cab of M-B is/was a cheapo car stereo. Quad speaker and MP3 friendly. This last was all that saved it from being replaced with another cheapo (NZ$70 odd) that has no cd or tape slot but does have a pair of slots for USB and flash drives. Cunning! Buy a cheap mem stick, load it up with all your music and you are laughing. No cd's under foot to either stand on, lose or provide temptation for miscreants. However, since the 1 I have is MP3 capable I can just burn my play list onto a cd and leave it in, changing it once a month or when ever I need something else. Fair compromise. A previous owner must have searched the land for the ugliest pair of bargain basement auto speakers known to man then screwed them to the walls left and right of the table. I took considerable satisfaction in removing them.
A cruise of TradeMe ( www.trademe.co.nz ) turned up any number of options at a range of prices from silly cheap (already have a pair of those, thank you!) to barking mad (nice but never going to happen). In the end I opted for a new pair of Sony Xplode 6x9" 60 watt automotive speakers at a delivered price of NZ$73. Paid for then and there by interbanking, they were delivered couple of days later and looked just the part. Best of all my measurements were actually right and they fitted perfectly!
A useful cardboard template came with them showing the size hole to be cut and the installed size as well. Mark the hole with a marker pen and go to work with the saw on one of my Swiss Army Knives.
A word about SAKs. Excellent. More words. Built properly, superior steel, impeccable build, fit and finish. In my humble opinion they represent a high tide mark of design and engineering excellence. Of all the pocket knives I've ever owned, and there have been a few, only the SAK has a saw blade that WORKS! Over and over and over. The world of compound knives is an interesting, lucrative and hotly contested one. There are some fine knife makers, Gerber, Leatherman, Buck, Shrade etc who build a fine product. With the exception of Leatherman I've owned all of the above and all have been acceptable. Sadly tho, only the SAK made a realistically priced (read cheap) saw option that delivers. Most cheapo knife saws will work once, few work twice. The SAK works. Period. If I meet ET in a paddock someplace and had to give him a present to take home, it would be a SAK. A primitive idea developed to a high art. Bloody marvelous!.
Anyhoo, the bottom of the cupboard turned out to be 2 layers of 3 ply, dig in the auger to make a hole then zipzipzip with the saw. The saw is narrow enough to easily cope with the sharp ends of the oval holes and was done before it could turn tedious. The speakers fitted neatly after a small trim of the holes, the supplied black screws wound in easily and almost suspiciously easily the job was done.

What's not to like? The other side went off just as easily.

This is too easy, when does the hammer drop? Only thing to be decided now was where to put the stereo head. When I thought I was going to get another stereo unit, the thought did occur I could get one with a remote control, then cut the unit in the cupboards on the horizontal between the cupboard doors, then it would be easy to reach while sitting at the table and with the aid of the remote, easy to work while in bed. Then when I decided to go with the one I had for now, the hunt began for a good place to put it. It didn't take long to see the best, ie easiest, place to put it was on top of the cupboards over the galley. Easy to reach from bed and acceptable from everywhere else. The fact I'm 6 ' tall bare footed helped too. Also easy was the fact there was a 12volt light switch handy to tap power from. Pry open the panel in the cupboard covering the back of the light switch and oh...my...god!
I suspected already that whoever re-arranged the 12 volt system had brain damage, but now I was sure. There are 4 12 volt lights (more on them later) inside, 1 at the head of the bunk bed, 1 over the galley and 1 left and right of the lounge. All the feeder wires were twisted together and jammed into the back of the bunk switch. Nice. So all the wires were removed, separated and arranged nice and neatly in 12 spot strip connector. 4 Lights, stereo and main feed = 12 wires. Some detective work with a multimeter showed which wire went where and were labeled accordingly.
I was going to make a nice neat aluminium bracket for the stereo head, but discovered some hard cell foam in my fly tying box (makes great spider and hopper floaters) which wedged the stereo head in place nicely, didn't need screws or bolts and can be changed with no effort later. Sweet!

It works! Add power, insert Johnny Cash cd aaaaand 'Hello, I'm Johnny Cash.' Rocking! Winds up loud enough to be painful and turns way down to a clear whisper. I had some concerns I'd need another pair of speakers for a good solid sound (the stereo has wires for another pair) but I needn't have worried. All good!

Stereo is clearly visible on top of cupboards. Note hand pump cold only tap over sink. Lots of campers have clever hot n cold running water, the camper I lived in did, very clever but raises an issue of when is clever too clever? Or if not too clever, then unnecessary. If I don't have it, it doesn't cost me and cant go wrong. A kettle on the stove will provide hot water and having to pump cold water will make me think about about how much I need anyway. There is no under floor water tank, that comes from a jerry can under the sink. Sooner or later the galley will be ripped out and rethought, but not today. In the meantime 'I'll keep a close watch on this heart of mine. I'll keep my eyes wide open all the time......'
Thursday, November 4, 2010
Step three, Bolsters to you!
A trip to a big cloth shop in Palmerston North was productive, all sorts of interesting stuff. Years ago one of me Ex's was right into making clothes and stuff, and she used to drag me from shop to shop looking at cloth and other junk for hours at a time. I hated it. Boringboringboringboring. She thought it was a great joke to wait til I said I was going to wait in the car then be absolutely concerned about my opinion about some cloth she hadn't quite found yet, it was vital I dog her foot steps and tell her what I thought. 'I don't give a shit.' was generally it.
Amazing how stuff changes when you are interested!
With a rainbow of colours and patterns at my whim, I ended up choosing a medium weight plain white rip-stop cotton at NZ$12 per meter. By my half assed calculations 3 meters would be enough. The upper bunk foam proved to be thinner than the bunk squabs and it was this I chose for bolster packing.
The 1st step was easy enough, decide on the dimensions. 300mm high turned out to be a useful size and was easy to work with so I went with that. Other dimensions were equally easy, just fill the gaps. I was going to need 4 in total, 2 backs and 2 ends. The 2 backs were 1 and 2 seat length respectively, the ends were the same. I wanted the covers to be separate so they could be removed for washing at some point in the future, easy enough. So, cut the foam to sizes, stretch the cloth over, cut and sew. No great trick and since they would be covered up, didn't have too lovely. Fortunately. It's been awhile since I used the sewing machine and I was no great shakes even then, but I managed to stumble through.
Spaced out over a couple days, it was no great effort.
Slightly harder were the covers, these had to neat(er) with a flap held down with inch Velcro at one end. A bit of dicking about but another day got it sussed. Now the fun part. As nice as the white bolsters looked, there was no way I could leave them like that, they would be scunged up and dirty in no time flat. They also needed to fit in the decor. Dye them, of cause, but I wanted a pattern too. Tie dye time! Yeehaa!
If the hippy movement of the 60's gave us nothing else, tie dying at least will endure. OK, so it also gave us pot and electric rock, both of which I'm grateful for, as well as free love, tho this proved to be something of a misnomer, in my experience at least free love is generally the most expensive kind. Back to tie dying.
I like green, it's cheerful and outdoorsy, so at the same time I got the cloth I also got a sachet of Lemon Green Dulon. The thing to remember about home dying is it always (in my experience) turns out lighter than you think, so get darker dye.
Tie up the covers, mix the dye and drop then in for an hour. The dye looks a promising colour. Pull out, rinse and carefully clip away the strings. Oh hell yeah! Just like I wanted! You have any idea just how rare this is? Wash them in the washing machine, hang out to dry and......

The duck's guts! A maybe a bit darker might have been nice but this way it should lighten the otherwise dim interior of M-B. Now to sew on the Velcro and stick the other half to the wall.
In a rare flash of foresight I thought to sew the hooked part to the bolsters and have a fluffy part glued to the wall. This way if I have the bolsters down for whatever reason, the fluffy bit will be nicer to lean against and hopefully won't trap as much stray lint and stuff. I wanted dark brown Velcro to sort of match the paneling but that wasn't to be had, tan or white were my choices, so tan it was.
Decide on the height, stitch the Velcro on, glue on the other half with F2 glue (love those solvents! No wonder drop-kicks huff the stuff!) aaaaaand...

Tahdah!
Cool or what? This the 2 seat side. At the top of the picture you can clearly see the false wall with the squab inside.

The single seat side with coffee sack pillow and bean bag on stand-by.

The view across the table, false wall and squab on right. Soon I'll build a flip top for that, it's just the right height for an arm rest or place to put a glass, can or what ever. Will stop the squab getting sun blasted too, as well as insulation. I think the pale green and tie dye goes with the recycled timber nicely. I'm quite pleased with myself, M-B looks more like a home and less like a demolition site. Just wish the other coffee sack would arrive so I can finish that as well. The bolsters against the back wall are not held in place tho I may do this later. They are just long enough that turned the other way up they are comfortable to lean against. Worked out quite well, really.

Loving the coffee sack!
Is it just me or am I making progress?
Step two. Padding.
A little more tricky, I'm better with power tools and the like but I do own a rather good sewing machine and have a passing acquaintance with it's use. We'll chop on and see what happens. You might have noticed I didn't build seat backs into the seats. I thought this over, fooled about with bits of ply, used my Dad as a test subject, sketched, thought some more and came to the conclusion that I would stick bolsters to the wall with Velcro instead. Preliminary testing showed this would be quite comfortable and make the place seem wider as well as keeping the table the original size. It's that whole living vs holiday thing again.
I'm maxing out the width and keeping the spacious table. Also means maxed out floor space, 2 people can comfortably pass each other, something not many campers can say. I call it foot room. The numbers tell me I have almost 400mm more floor width than I had with the old set up. Couple this to the much lower seat profile at the door/galley end and the living space seems huge compared to the way it was. That's more like it!
I've also picked up a kid size bean bag for extra seating on either of the wheel arches. My oldest sister suggested I ditch some of the beans and replace them with foam chips. So some experimenting later, I tossed half the beans, replaced with half as much crouton sized foam chips and the end result works nicely! Good call. It weighs nothing and works well.
The first piece to be made was the single seat cushion. Some head scratching over what to build the cushions and bolsters out ensued. Options were considered and dismissed. Then Mother suggested a cool cushion she had built out of a coffee sack.......perfect! It was a bit big and somewhat lumpy due to the 2 smaller cushions she had used to stuff it, but this was easily fixable. A piece of foam from the old squabs was cut to size and the hessian sack was stitched to sized, no need to cut, just roll the seams inwards and stitch, easy!
I was going to do the rounds of the coffee roasteries to get a bigger sack for the double seat, but about the same time Mother had a conversation with nephew Cosmo in Melbourne. He's heavily into the coffee scene there and said he would post me a cool one. Brilliant!
Time to start on the bolsters.
Wednesday, November 3, 2010
Step one. Trash the joint.
Step one. Assess. What do we have to work with? Well, everything that isn't fake dark wood panel is cheesy pink velour and beige vinyl. The paneling I can live with but the god awful upholstery is toast! Also the icky chest of drawers at the back under the window is held in place by 3 or 4 small wood screws that have been twisted in at odd angles, the lil screw driver fins having been stuffed at the time, so forceful removal was needed. There was also an extending table on top that could be pulled out to nearly the same length as the seat/bunks. Sounds like a good idea, but who ever built it shouldn't have. It didn't sit anything even close to flat, each of the 3 panels that made it up each had their own angle, none flat. Byebye.

Oh that's better! Bunks next. After I lifted the main bunk squab to see what was underneath I discovered the vinyl cover had burst it's zip and the foam rubber I could see was, frankly, disgusting. Remove and throw away. Also the pan it sat in has a damp spot in the middle, mine and other's body sweat most likely as well as evidence of an old leak in the front right hand corner. (more on the leak saga later) So a nice new mattress was indicated but in the mean time I'd camp out on one of the bunks and left the mattress tray dry out. No problem, just shift operations to one of the 4 other bunks available. For no reason I chose the one in the left of picture, seemed comfortable enough. Quite neatly the back rest swings up and gets propped to form the upper bunk. Until I tried it. Narrow! Also it had 1 count it 1 cross support, a a curved steel rod about pencil thickness half away long. Perfect for balancing your kidneys on. Bottom bunk it is then. At least now the bottom bunk was 4 or 5 inches wider but the top bunk was just high enough to pull up your knees and no more. One night of that and I removed the top bunk.

Note removed chest of drawers in the middle. The wheel arches (boxes actually) fill the front half of the under bunk space, the rest taken up by a badly thought out drawer on each side. Also byebye.
Time was spent with sketching the insides how I thought I might want it. To start with I thought I might leave in the left-of-photo bunk and put in a 2 person dinette where the right bunks are with the fridge next the side door. Then I thought I would gut the whole thing, put a small wood burning stove in the back left hand corner and leave the rest of the space for a pair of armchairs.
A some years earlier I lived in a camper for 4 months with my then partner and a number of interesting things revealed themselves. First off, the camper you holiday in is NOT the camper you live in long term. Campers are by their very nature 1 big compromise. You try as hard as possible to pack as much as you can into a finite space. In this case living accommodations for 6 people. Living on board long term is a different ball of wax. Right from the outset I planned it to be semi-permanent living for 2 people plus an extra as needed. 2+1.
The biggest must for long term living is a permanent bed always set up and ready to go. When I lived with my partner this was not possible. There was a cab-over bed but due to a debilitating injury she was unable to climb up to it. No major problem, there was a second double bed made by dropping the dining table and we used this instead. All we had to do was choose between having a bed or having a dining table. Tedious. Also when bedtime came, I had to go outside and admire the night in order make room for bed making. Finally and to my mind most irritatingly the bed mattress was a series of seat squabs arranged to make a bed. I ALWAYS ended up in a gap someplace!
The camper itself was modern design Toyota, drove handily and diesel to boot. It was set up as a 4+2 birth and was packed to the hilt with all sorts of spiffy gadgets. Even had an on board bathroom complete with hot shower and chemical toilet. We never used any of it and the space was used for storage and somewhere to put the cat tray. Yup, even had my cat on board. Thus the living vs holidaying thing. At the time I gave some thought about what I would change, but given that it wasn't actually mine I never changed a thing.
So. Permanent bed. I don't mind climbing the boarding ladder up the cab over bed, it's a good size and has a window at each end for good ventilation and views. A trip to Para Rubber for new foam squab came as a shock, a 2 X 1 meter pad costing me NZ$173!!! Ouch! Instead of making a cover for it, I discovered a king single duvet cover was just the right size, so a cheap (NZ$12) one was had and that was that. I move off the horror bunk and back up into the hump. Time to rip some more stuff out.

Stripping away the layers of nice thick ply wood (saved for later and proved well useful) revealed the bunk form. The big square thing is the wheel arch, note awkward storage around it as well as the daft drawer with oodles of wasted space to the right of it. Byebye.

Oh the horror! The photo doesn't show it but in the right hand corner is a fist sized hole in the floor where a historic water leak has been at work. The back window has been leaking for years in the corner, easily noted by the old water tracks down the wall where I peeled back the black lining. OK, I expected this sort of thing, it's a 30 year old camper that doesn't look like it's had any TLC in the last 20. More horror. A gentle push on the middle of the bottom of the window causes the whole back wall, window and all, to bow out nearly 2 inches.......Oi Vay! Ok, finish ripping out and salvaging both bunks, I need to get to both sides of the back wall to see just what I'm dealing with.

Yup, the back wall is being held together by the aluminium sheet and not much else. Most of the joints have let go. Who ever built it in the 1st place cheaped out and just glued the joints without putting nails or screws. Go to work with screws and builder's adhesive, fix the pot hole in the floor with plywood and generally fix, glue and screw everything in place. Once that was under control I replaced the insulation and used the tops of the bunk/seats (nice thick marine grade 7 ply) to cover in the back wall under the window, braced on the floor, window frame and walls . Originally it was cheap 3 ply with all the rigidity of wet newspaper. A couple of days worth of cursing and swearing but now the back wall was more like the Berlin Wall. Getting somewhere! I kept telling myself I had passed the 'ripping stuff out' phase and was firmly in the 'putting stuff back' phase. Now I had a nice big open area to work with.
Time for more sketching and masking tape on the floor to delineate furniture. Things to think about. 2+1 people long term. Must be pleasant to look at. Must be fairly easy to do. Cheap without being a cheap skate. Storage. Solid.
I thought about rebuilding in ply and slat like the stuff I ripped out but dear god is that ugly! Not all that cheap either. Then I thought about some of the deeply cool house trucks I'd seen at gypsy fairs and the one thing that always struck me was the beauty and practicality of Tongue and Groove timber. Now we're talking!
New T&G was a daft price for common pine and native timber was just plain silly. Beside recycled timber is and will always be cool. Time to do some research. A trip to the biggest nearest timber yard showed that new timber was waaaay to expensive. However, the nice guy I was talking to said there was house wreaking yard just down the street..........
Was there ever! Old timber from here to there and back again in every shape and wood known to man. The owner was another nice guy (Levin seems to breed them) and knew exactly what I was talking about, leading me from heap to heap pointing stuff out and making useful suggestions. Yeah baby! And best (for me, anyway) of all, the yard was closing in a few months and everything had to go. I could have all the T&G I could eat for *drum roll* NZ$3 a meter!
Float home on a cloud of satisfaction.
The next couple of days were spent finalizing design and measuring out how much I would need. 51 Meters in assorted lengths.
Go back to yard and spend a couple of hours pulling out boards (80X30mm Totora, a New Zealand red hard wood.) Checking them for splits and damage and cutting them to slightly over length. 100 Year old floor boards full of interesting nail holes and rust stains, perfect! I ended up paying the guy NZ$200 for the use of his saw and spoilage. Most of the boards were 4 plus meters long, but by the time I cut the good non-split or damaged bit out, 2 meters or less. Stacked timber in the back of my dad's station wagon and took off before he could change his mind.
Now we can get going!
Built the right side first. This side is a twin seat and storage bin.

Doesn't look like it in the photo, but it's within a couple of centimeters of half and half. This was to work out quite usefully. What isn't obvious is the false wall I put in 120mm out from the actual back wall. In that is a full width gap filled by one of the old seat/bunk squabs. Table (not built yet) up, the squab lives in it's slot. Table down the squab gets pulled out and laid down to make a side to side (almost, 8 cm short but I can live with that) bunk/couch. The bloody awful vinyl is covered by a cut down duvet cover. Remember what I said about hating beds made up of several bits? Not this time. When the squab is being used, the 2 seat squab fits neatly onto the lower part for ad hoc seating. Starting to take shape. Cool!
Built the left side. This one is a single seat and the same width as the bunk/couch squab. The lower part just covers the wheel arch and stops short of the door to make the doorway more user friendly. The timber is covered with dust and gunk in the groove and on the side that was underneath. I used the other side so the board butted up neatly and nearly flat. All of it had to be scraped clean and wire brushed to give the builder's adhesive a clean surface to stick to. A long bead of glue in the groove then tapped into place and screwed to a cross slat and left to dry. Should be strong as all get out.
Once both sides were made I could move onto the bit I was looking forward to, building the table. In the below photo you can also see the end of the table. Seat tops are the last of the ply saved from the bunks. I was going to hinge them, but laziness won out, the tops have slats underneath to locate them firmly in place and stained to more or less match the T&G which I sanded and wiped with linseed oil. Looks brilliant! Seats are oiled, compare to the table top with currently isn't. Note the row of holes in the wall where the old bunk was.

The more observant of you will have noticed the table is a funny shape, 2 seats on 1 side, 1 on the other. This partly because I'm trying to make as much open space as possible and partly because I'm thinking of adding a pedestal seat later. The lower right side of the seat is boards laid flat in the wheel arches. Plenty strong enough to jump up and down on. Both sides are the same.
I was going to build the table top by just laying the boards together then cutting them to size, but Pop said 'Why don't you make the front 2 or 3 boards full length on an angle, it'll be much stronger...' He's good like that.
So I made the back section first, glued together and screwed to a temporary brace underneath. Then when that had dried, made the front section, glued and screwed and left to dry then cut n tucked the filler wedge to suit, slathered everything with adhesive and left it to dry some more. A day later the temporary brace was removed and the permanent V brace was glued and screwed. The open ends of the V are against the wall and provide somewhere to put the wall hooks, the sharp end of the V provides a good place for the steel leg.
How to hang the table proved to be a bit of a head scratcher. The easy thing to do would be to put a strip on the wall and sit the table on that with a peg at each end to hold it in place. Only catch with that was that I wanted the wall flat and smooth to be comfortable to lean against. After a couple of ideas I opted for a 50 X 24 X 2mm steel box section bar from one side to the other behind the false wall at table height. This was braced at both ends for downward and backward stress (table and people leaning on the wall) and screwed into place then covered with the 5 ply sheet and stained to more or less match the rest. Worked out quite well. The table itself is held up by a pair of 5mm coach bolts with their heads cut off and bent to a not quite L shape.
Holes were drilled into the front edge of the steel box and the bolts were wound into the table between the table top and the V brace. Totora is a lovely timber but splits at the least excuse. So pilot holes into the table were used and when I put in the V brace I glued the living hell out of it and put half a dozen screws per side in the last foot of timber. I'm building for the ages here, people, and who knows, maybe some day a dwarf might dance the fandango on it, who's to say? Better safe than sorry.
Table finally finished, gaps filled and given a good but not final sanding. I'm going to wait a few months until the table has hardened properly before I finish it. Then I'll plane it back and back until it's as flat as I can make it. I also discovered the builder's adhesive I used isn't that hard and refused to sand back cleanly the way the timber fill did. Here it is together before I added the wall hooks and leg.

Oh you pretty thing! You can see the angled boards at the front of the table fully supported at each end unlike the angle cut ones the way I was going to do it. Much better plan. The brick red stuff is the timber fill, the whitish stuff in the build's adhesive. Now to leave it for a few days to dry out enough to sand and oil.
The busy lino pattern is the original flooring, I cleaned away a layer of industrial carpet and another of white lino to expose this. After I sugar soaped the whole floor twice (oh the muck!) it isn't in too bad a shape, albeit a bit tacky. This can stay till I'm ready to relay the floor in cork tiles later. I'm hoping the cork will be warmer and a bit softer under foot as well as matching the timber better. Worry about this later.
The table leg caused me to scratch my head a bit. In the end I chopped up one of the bunk frames (thin wall 1" box section steel) with the hinged bunk leg visible in photo 3. The hinge was welded to the steel and was nice and strong. I carved out a strip to inlet the hinge pin and screwed the whole thing together. When the table is up the table is supported by the half buried hinge pin, strong as you like!
Finally it's all together and it looks like this:

Oh lovely! At this point I'm feeling well pleased with myself but a couple of things have become obvious.
First and most importantly is the point of the seat that jams you in the calf as you go to slide in the double seat.
Out with the hand saw and truncate the corner as much as reasonably possible. You can see this in the left hand side of the photo. Also it's harder than it might be to actually slide into the seat. I've curved the corners but not enough, also I'm going to cut a 3 inch strip off the front of the table to make access better but I'll hold out on this for a few weeks to see if I get used to it or it becomes obvious that it needs to be done. No rush. Need to think about squabs and stuff next.
Martin-Baker Rising.....

What does this have to do with me?
Not much except that 1: As super heroes go he's easily my favorite and 2: Much of what we think often turns out to be wrong.
Take me for instance. No kids (that was ever proved), no wife (dodged that bullet or what?) never owned a house and a string of jobs that were, at the very least, forgettable. As a kid I thought I might be a radio engineer like my Dad, but that is fairly standard for kids. Then I thought I'd join the Air Force (while we still had one worth the mention, gee thanks Uncle Helen!) as an armorer (glasses and hopeless maths meant no flying for Micky) until I remembered I loath getting up early and don't cope well with being shouted at by someone I cant shout back at. Anon......
So, here I am 30 years later with few actual qualifications but a fair bit of what is politely termed 'life experience'.
I wont bore you with the details, but (and I would never have guessed THIS!) here I am as live in help to my aged parents. Pretty sweet gig really, I do all the driving, fetch and carry, wood chopping, edges of the lawns with the hand mower. The middle bits Pop does on his ride-on mower, something he loves to do. That sort of thing. For this the government pays me (literally) a couple of bucks more than the dole. Gee thanks, don't strain yourselves or nothing.
I could have lived in the house with my folks, even had a choice of bedrooms but instead I took the 3rd option. I moved into the camper.
The Camper. It's a 1980 Ford Transit with a camper body commercially built by......I don't know. Yet. Originally it was organized (not a word I would have used) as a 6 (!) birth but as will become evident this soon changed. The original motor was the 'Gee this looks like a good idea' V4 2 liter petrol engine that, in all fairness, when fresh was a fairly good mill. At some point in the camper's somewhat chequered history this P.O.S has died (or was killed) and was replaced with the evergreen 2 liter Ford Cortina mill. I dont like Fords. I was completely and utterly put off them when I made the huge mistake as a teenager of sinking all my hard earned scratch into a Mk4 Zephyr, complete with the utterly worthless V6 3 liter motor that nearly inspired me to either murder or suicide on a daily basis until in a rush of sense I finally towed it to the dump and left it. Good job. As I watched the heap receding in the rear view mirror I swore a mighty and terrible oath to all Gods past, present and future to never own a Ford again. 25 Years later, enter the camper. See what I mean about stuff turning out to be wrong?
In all fairness the Cortina motor is actually a Ford success story, millions have been made and used for everything from water pump motors to potent racing engines. Guess I'll just learn to live with it. If nothing else it's a simple and easily worked on design, and in the Transit engine bay it looks like a beer crate in an otherwise empty basement. The other up side is the camper has no power steering, no A/C, a 4 speed gear box that only needs to keep full of oil to probably never fail and, as I discovered, no heater either (more on this later). In short it starts good, runs ok and isn't weighed with useless and power sapping junk. So far so good. Right about now you are probably saying 'yes but wouldn't a diesel motor be better?' Yes and no. Yes, it would be faster on hills and in head winds and a tank of diesel will go nearly twice as far and is about 50 cents a liter cheaper than gas.
The no part. Here in sunny scenic New Zealand we dont pay tax at the pump on diesel fuel. To make sure the diesel driver is gouged as much as petrol users, we pay a road tax in the form of road mileage. You buy this in 1000 km blocks and get a sticker to put next to your registration sticker behind the windscreen. This gets checked by sundry government flunkies and there are stiff fines if you get caught out. Also it relates to the vehicle not the owner, so it's possible to buy a diesel car/truck, whatever that owes a pile of mileage and the new owner gets landed with it. Nice. Add to this the 'ohmighod!' cost of fixing a diesel and, unless you plan on doing a pile of mileage, like an epic holiday or something, I don't think it's worth it. By my counting it would cost about $2500-3000 to do a proper job of installing a decent diesel donk. That buys a pile of gas. I may back track on this once I have a few trips behind me and can get a better idea of $/km's.
Back to the camper..
God knows I don't begrudge my parents my being here and helping out, but the simple fact is the stuff I do for them is only a tiny fraction of my day, the rest of the time is mine. Once I caught up on my sleep it quickly became apparent I was slowing going out of my god-damn skull with with boredom. Pot helped, but even this palled, not to mention the cost. It was at this point that my folks generously gifted the camper to me.
Now I have a project! OK, it's not emperor of Iceland or, quite, a Polynesian long ship, but it will do in the mean time and will later be instrumental in my larger plan. Right about now the more astute of you will be saying 'Yeah cool, but why does the front of the camper read 'Goldies' and where does Martin-Baker fit in?
It's the custom here (and maybe the rest of the camper world too, I don't know) to name your camper in the same fashion as naming a water craft. Goldie's comes from a previous owner, a chap named Goldstein. I never liked the name and ratted my brain for something I could relate to. Fuck You! sprung to mind but this may have cause problems later for all that it is largely sincere. So much brain searching, name trying etc until I remembered an episode of 'JAG' where a pilot was forced to land his jet in the middle of a desert intact, then tried to walk to safety only to be picked up by bad guys. In the show off tape his captors made of him, he acted mentally deranged and would intersperse his anti-american script with 'no martin-baker, no martin-baker' as a clue that his jet was intact and could be retrieved. Martin-Baker being the manufacturer of ejector seats..........
Subscribe to:
Posts (Atom)